Image Gallery of Classic Fighters 2005

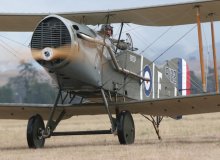
"Applying the fabric to the Albatros DVa was a painstaking task, but it had to be done using authentic methods and authentic components."
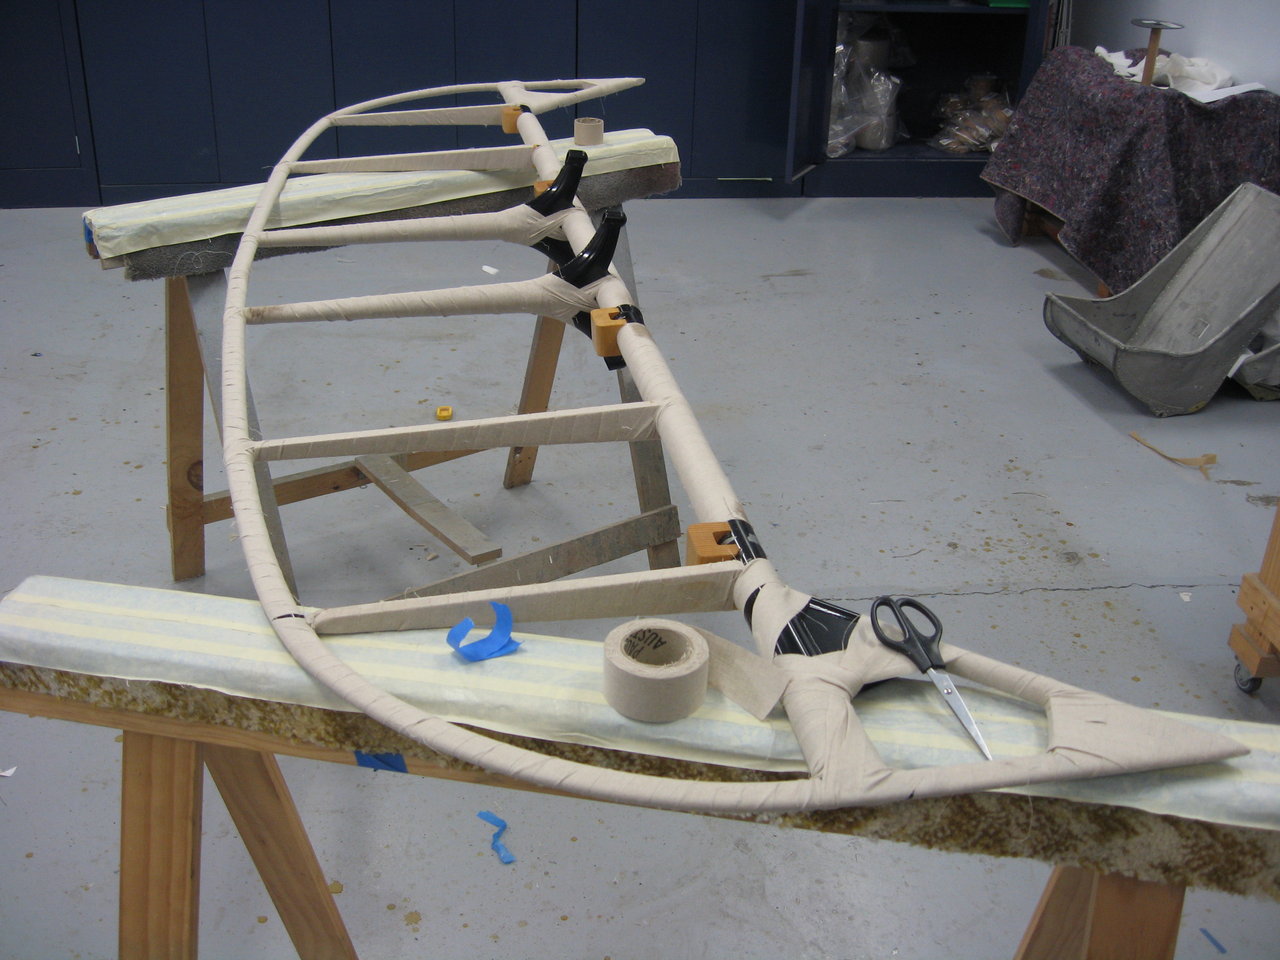
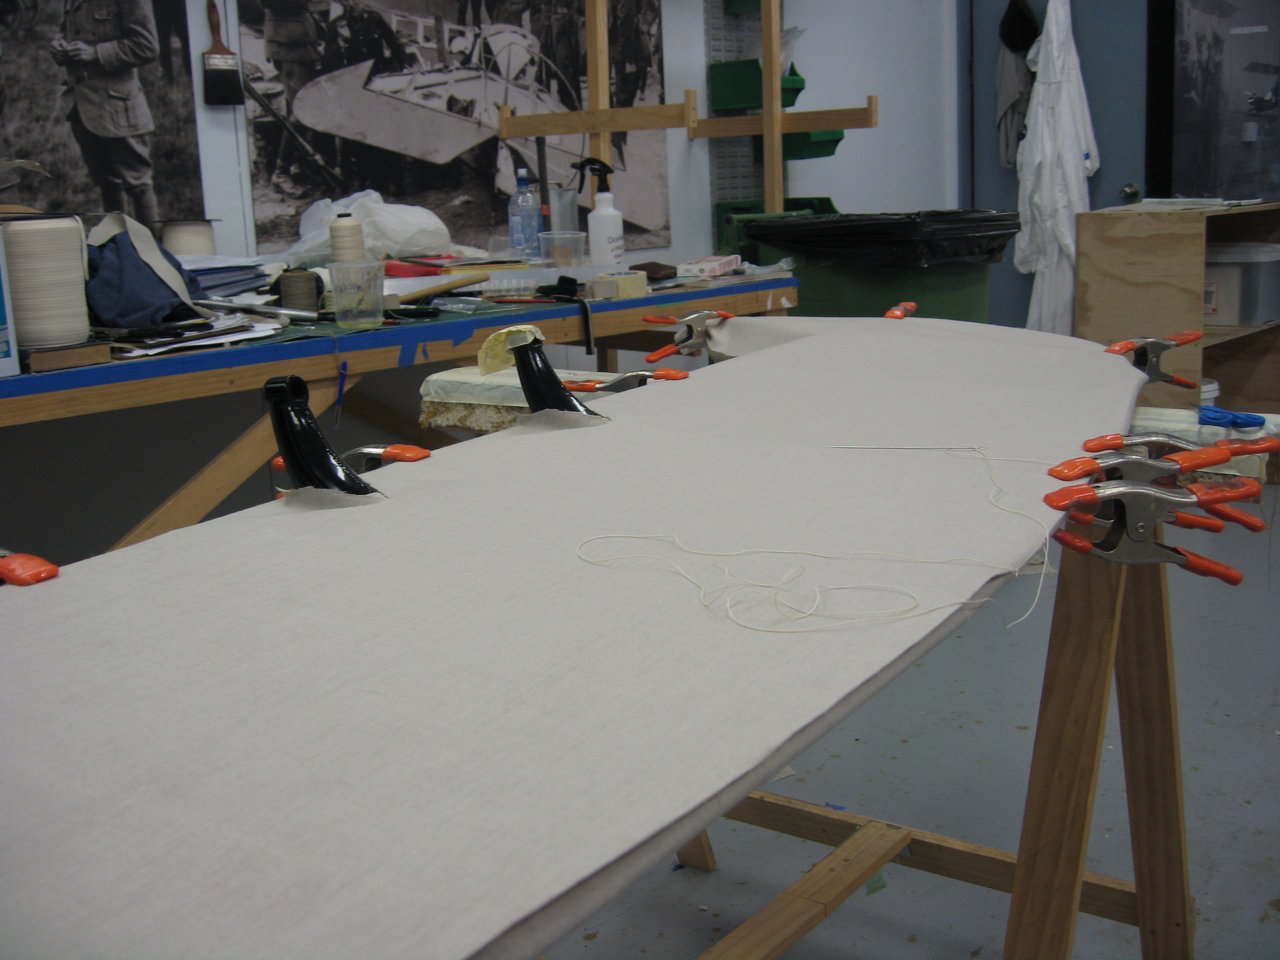
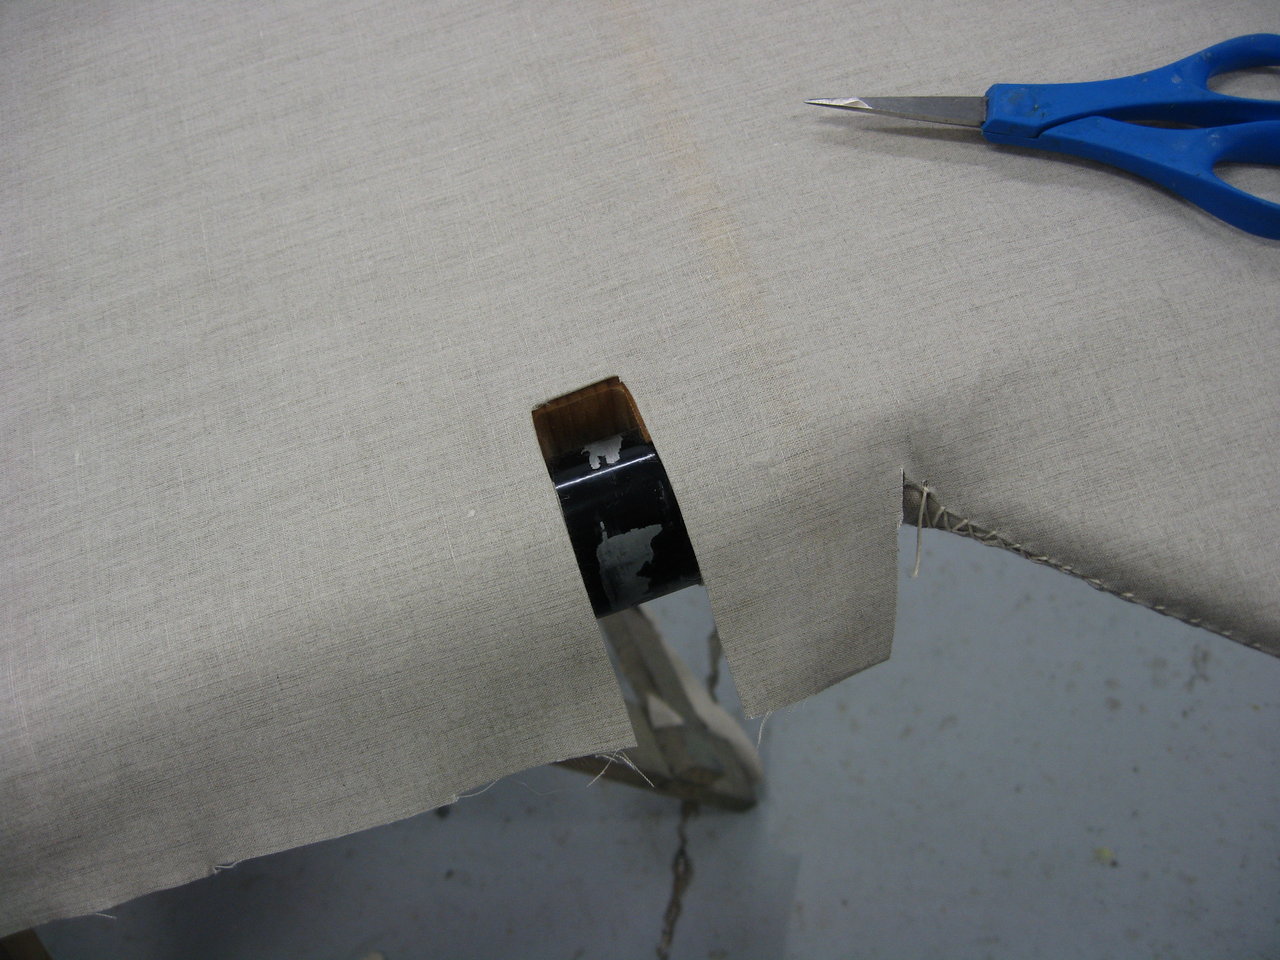
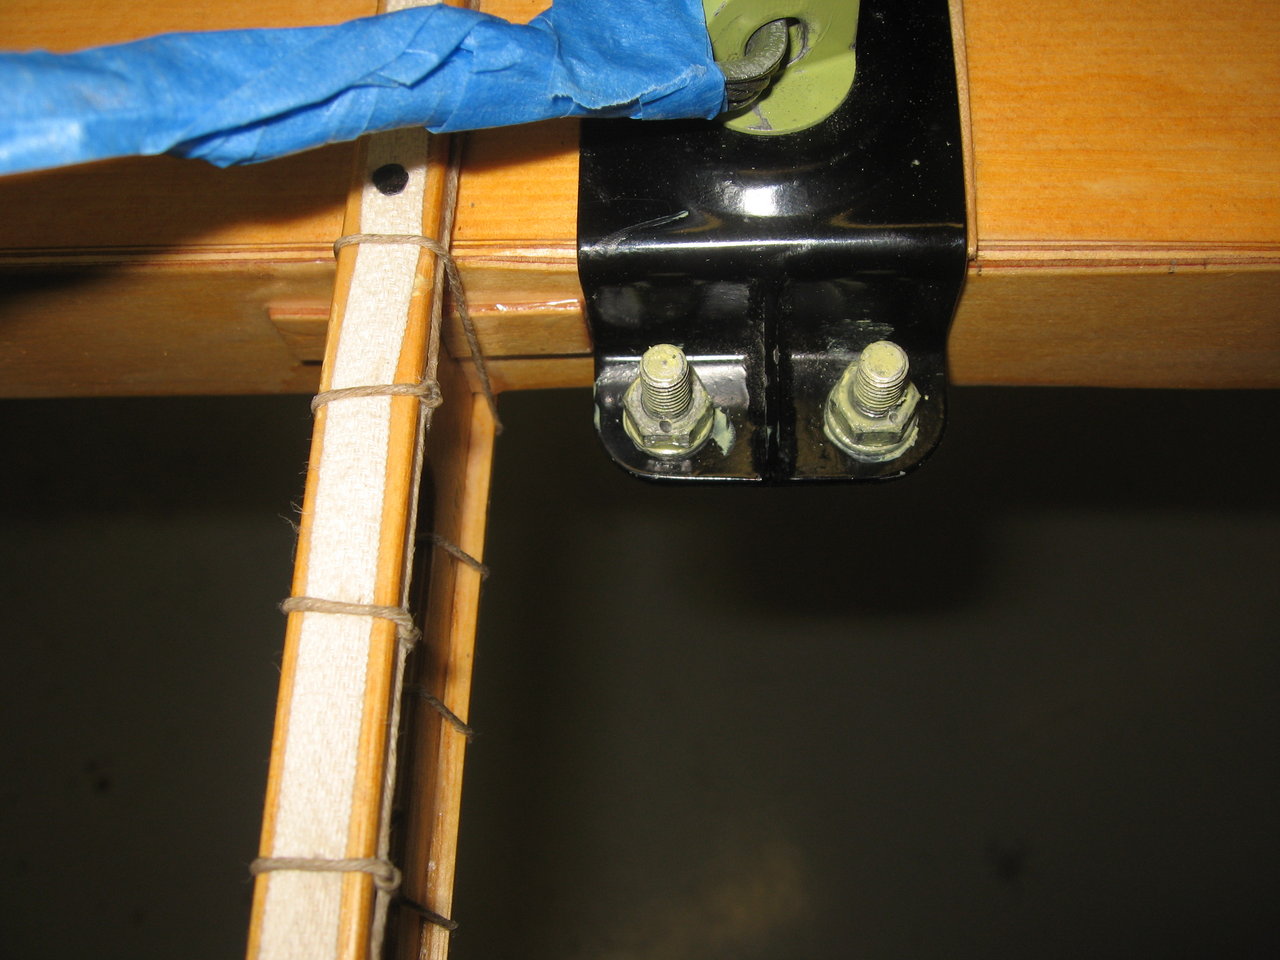
As the tail surfaces on the“Mai” Albatros were a solid colour we decided to use plain linen which would be covered by paint. The frame was first wrapped with linen tape. This helps protect the frame and fabric from chafing and also something to sew to if required.Then 6 mm braided tape is tied on with linen cord every 30mm. This comes into play during the rib stitching process. Next, the bottom layer of linen is attached and glued. The top layer is then sewn on using a baseball stitch all the way around the elevator.
Applying the Dope
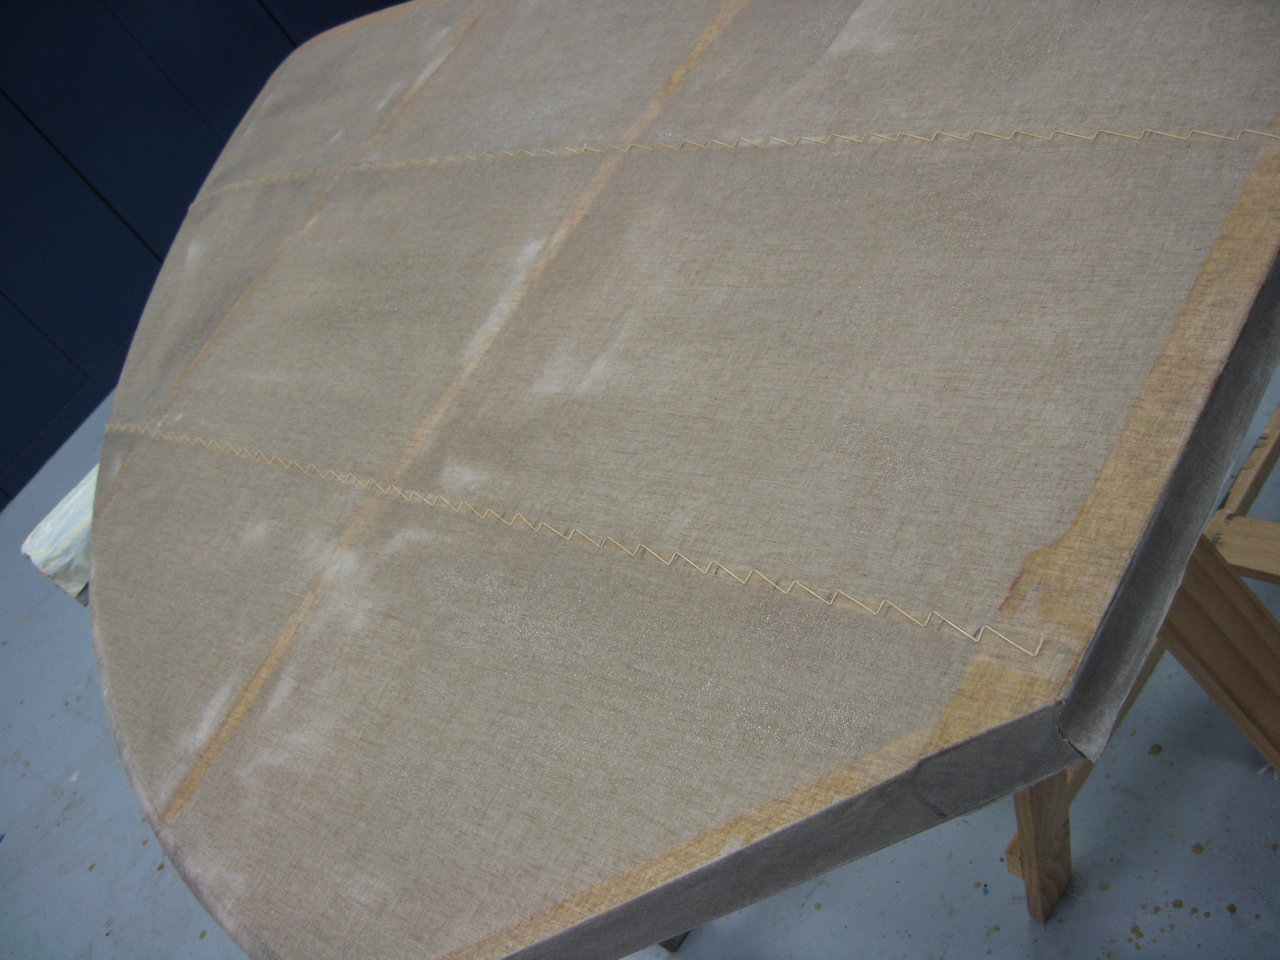
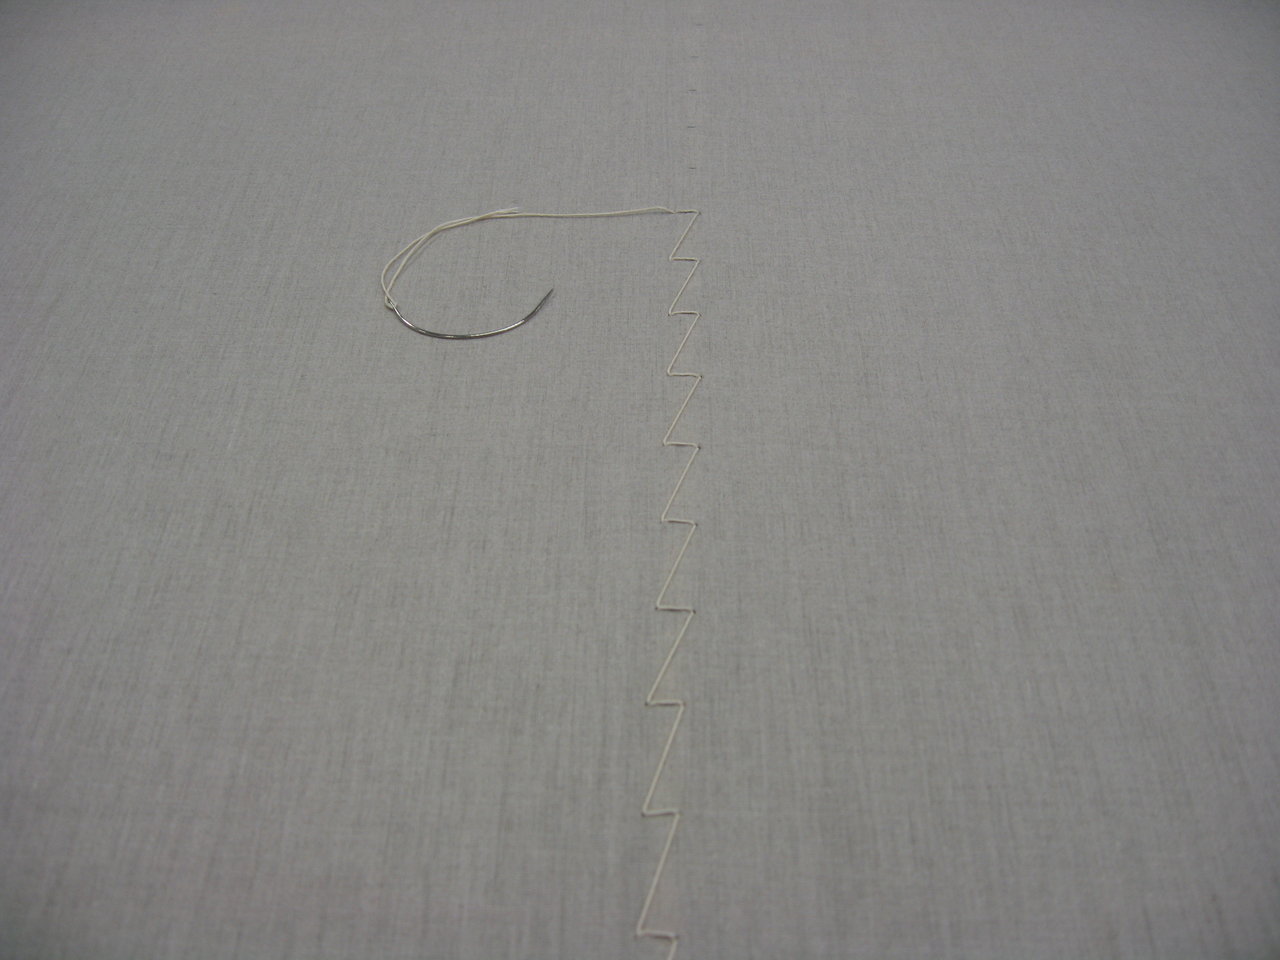
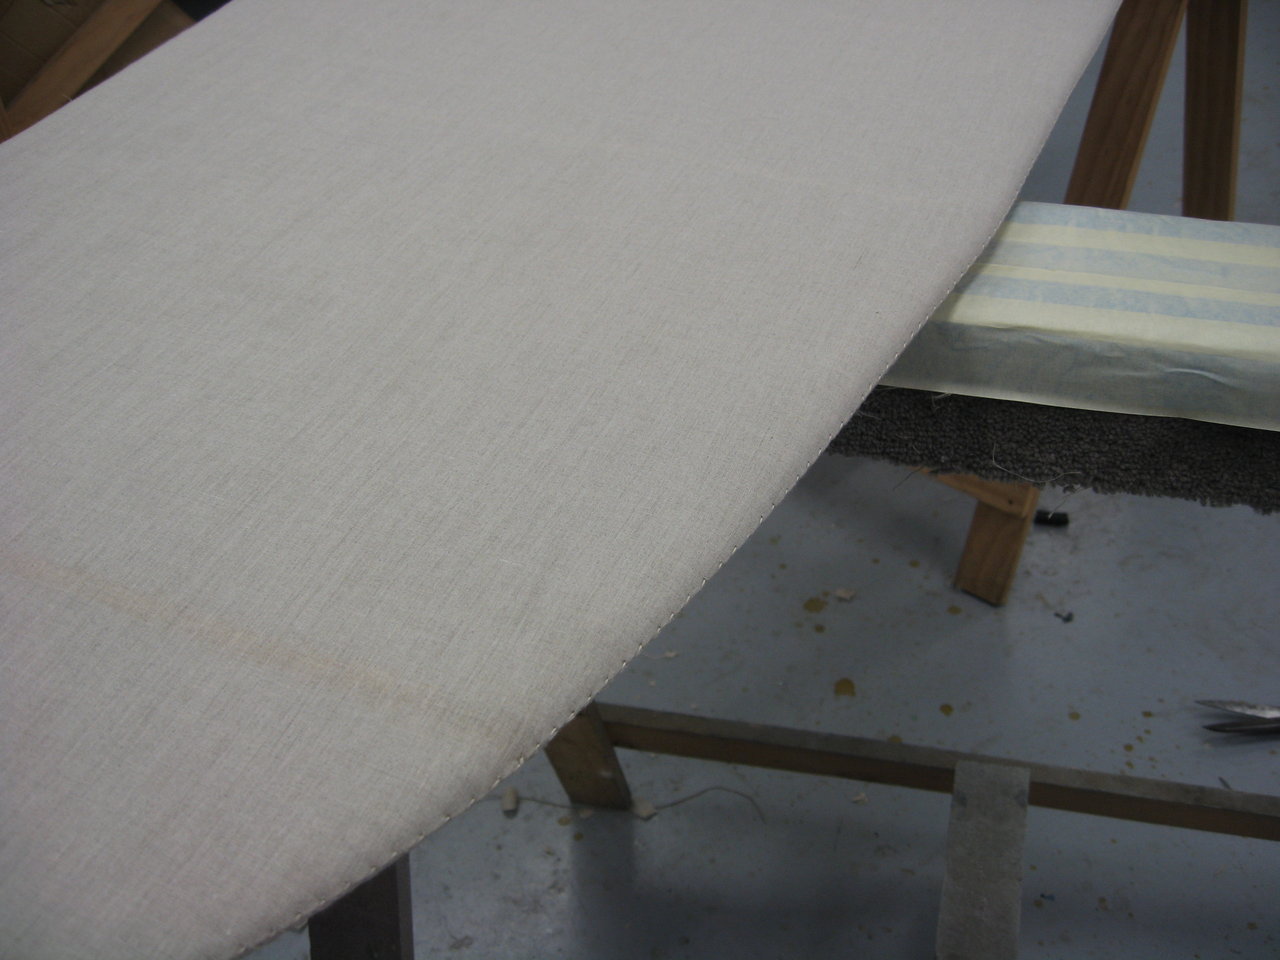
Once the fabric is attached, it is shrunk with water to shrink and straighten the fibres. Before we applied dope we did the rib stitching using the original method. This involves using a curved needle to capture the previously mentioned 6mm braided tape by hooking a double thread around it and over the linen every 30mm. You then end up with a zigzag pattern along each rib. Once all the stitching is carried out then the first coat of dope is applied. Then tapes were laid over the rib stitching and dope layers added until required finish achieved.
The attractive lozenge fabric is once again exactly as originally produced. We had the design printed on Irish Linen by the roll, and then we applied this to the wings using the original techniques gleaned from various sources and cross referenced painstakingly by our covering and coating team. First of all the underlying ribs and structure are sealed using more modern materials. Linen tape is applied over the leading edge ribs and various places to help protect and attach the top layer of fabric.
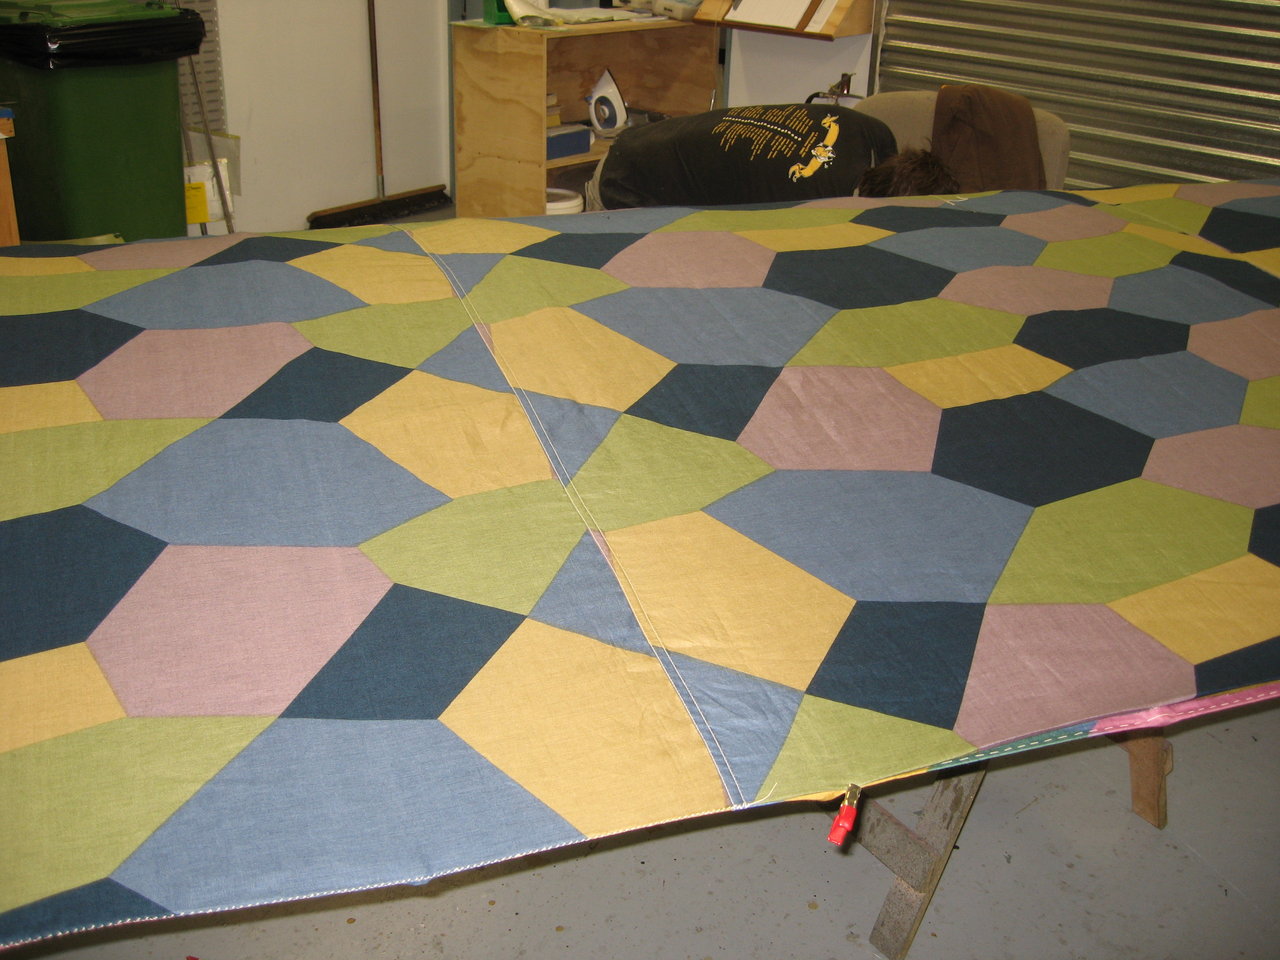
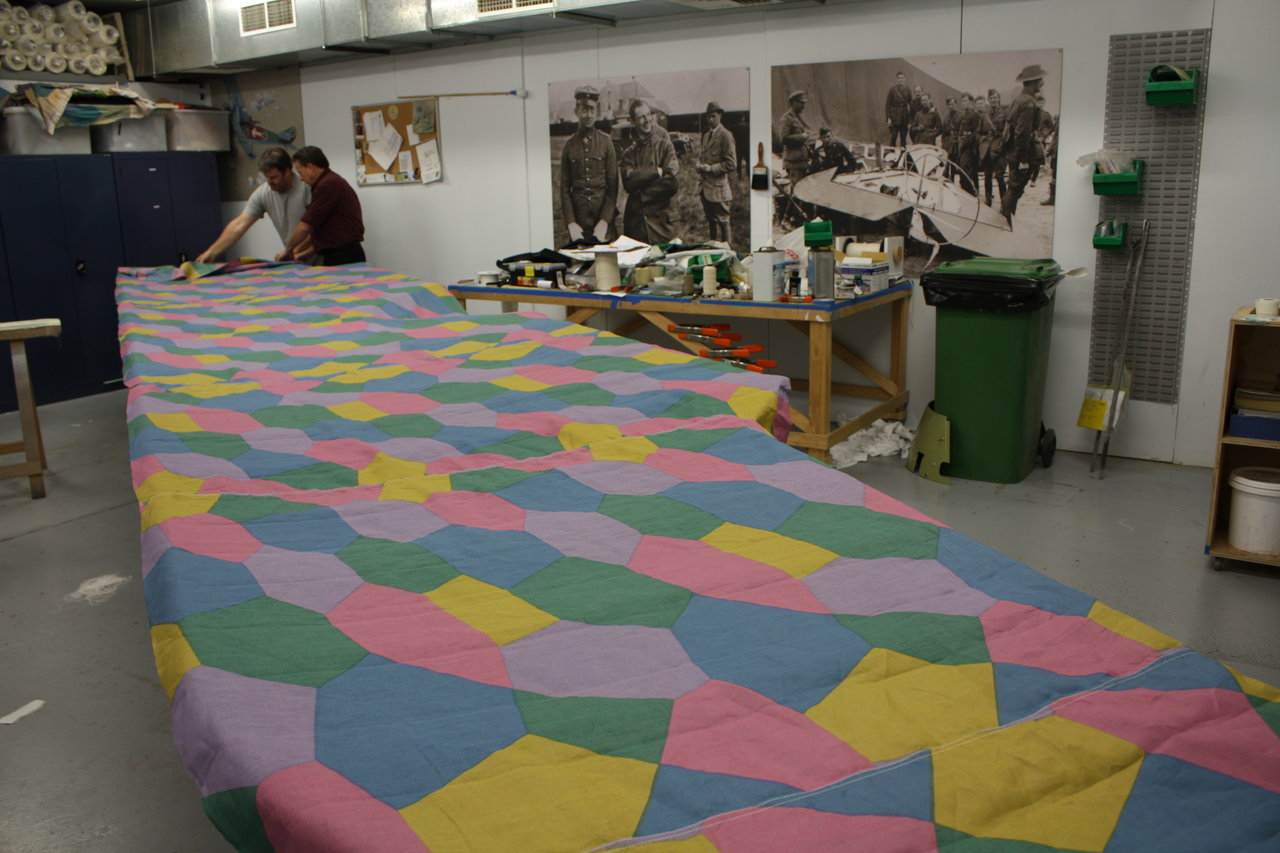
Then we attached the 6mm braided tape to all ribs to be rib stitched with linen cord. This is wrapped around the ribs and knotted every 30mm.After that, the lower surface lozenge is sewn into a flat panel large enough to cover the lower surface of the wing panel. As the long top wing is one piece, this is a large panel.Getting the fabric straight and the lozenge pattern neat is a major consideration. Don’t want to ruin the look of the aeroplane at this stage! Fabric is held in place by sewing trailing edge wire and using tacks and pins. Drain hole grommets are also applied directly into the trailing edge fabric as per the originals.

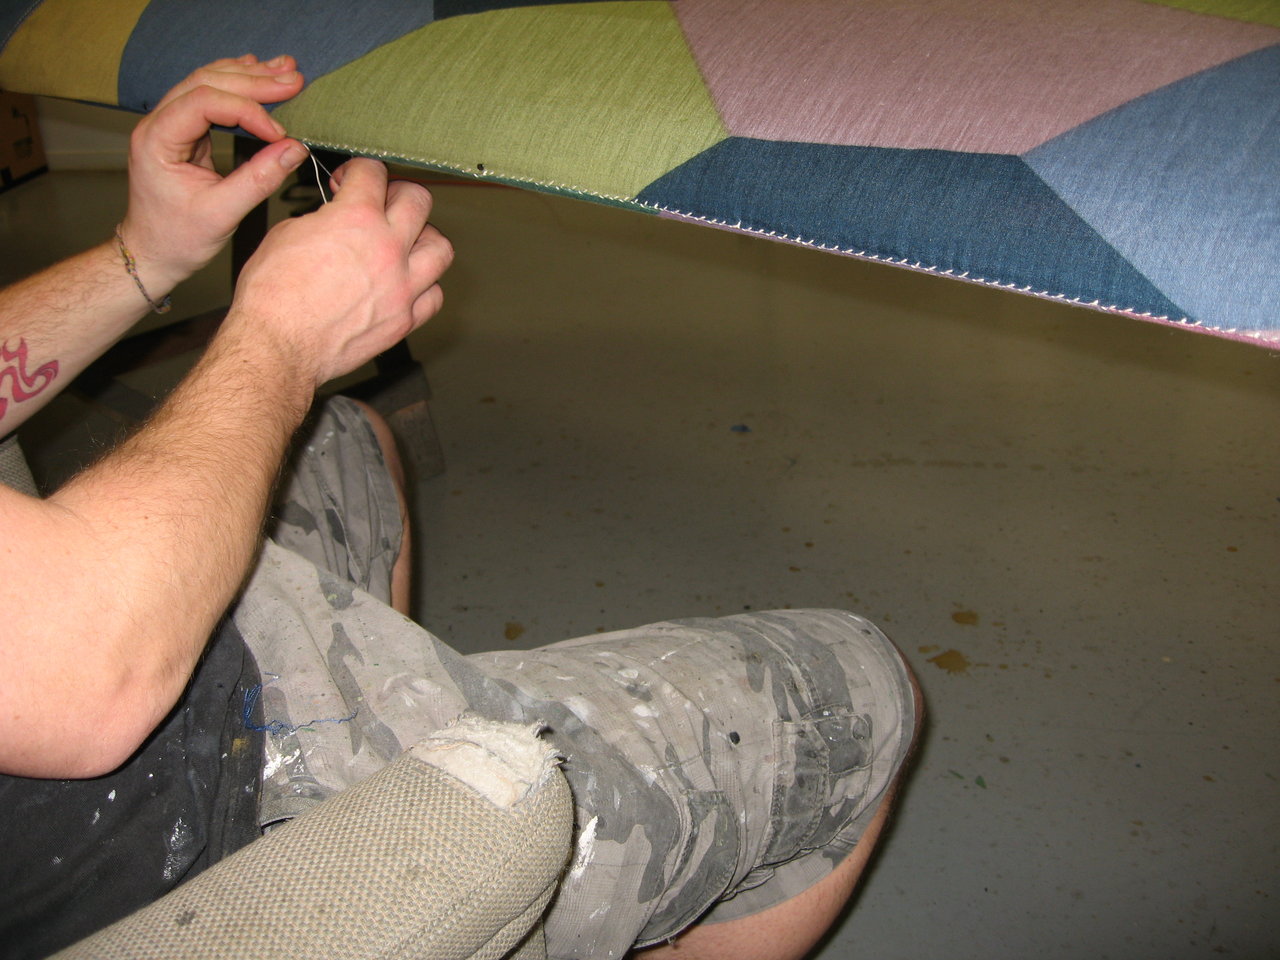 "The wing is then turned over and top fabric is laid on and all seams lined up to ensure the pattern is straight. Top fabric is then sewn to the lower panel all the way around the perimeter using the baseball stitch."
Once the wing is sewn and fabric is attached, it is wet to get the fibres to shrink and straighten. Then all ribs are stitched using the zigzag technique as above. Dope is then applied, cut-outs for the radiator, aileron horns are reinforced with tape. Tapes over ribs and around leading edges etc are applied. Final finishing coats to get the required gloss are applied. Then crosses are painted for the final result.
Using the zigzag rib stitch is time consuming when compared to the RAF style but it does give the correct look to the finish. Its very distinctive and shows up well under the tapes.
By Paul Buchanan. - From the Vintage Aviator Workshop 2009
